Showing posts with label Rod Building. Show all posts

Thursday, June 6, 2013

Another Rod Build Complete

  I posted last week about the current rod build I had going on. This one is for dear old dad for fathers day. The rod looks awesome to say the least. They just keep getting better and better. This rod is a spinning rod with the new Microwave Guide System see other post here . I went through the specifics and posted some pics on how the system works. The rod in general should be a fish catching machine.

  The rod- on all the guide wraps I went with a dark green thread wrap as that is dear old dad's favorite color. Cross wraps where metallic green and silver to give the cross wraps a little pop off the blank. The rod features a split grip handle, so on the split end I did the same cross wrap as I did in front of the fore grip. The Microwave guides are like  the cherry on top of the sundae. I can not wait to give this rod to the old man. I know he going to absolutely love it.

  I also added a little touch that I know he will appreciate. On the last few rods I have been using a metallic marker to mark the line weight, length, and a serial number so I can track back to replicate a rod and such. But the cool thing I have been doing is "naming" the rods. The previous trolling rod I built for my Walleye friend was named " The Old Sock In The Wash" because that is usually what we call each other cause we are such great friends. Then when I came to this part of the build I was stumped on what to call it. I wanted it to have meaning, and be kind of funny at the same time. My father and I joke with each other quite a bit and always call each other funny names like Putz, Dufuss, etc. The list could go on, but I didn't want to put something silly like this on a rod he was going to look at constantly, and then it hit me. The old man used to be an over the road trucker for many years, and he is also very polish. His old CB radio handle is one funny name and fits him to the T. The Cb handle he used was " The Happy Pollack" Very fitting for him, and his rod I believe. He should get a kick out of it, and maybe a slight tear in his eye. I hope he enjoys it as much as I did building it. So I give to you some photo's of the newest rod "The Happy Pollack" .

The Rear Split Grip Cross Wrap

The Cross Wrap And Hook Keeper In Front Of Fore Grip 

Another Shot Of The Rear Split Grip

" The Happy Pollack" Name On The Blank

Close Up Of The Cross Wrap

Rear View Of The Rod

Guide Wrap With Microwave Guide

Close Up Of Guide Wrap

Close Up Of The Microwave Guide

A View Down The Rod As It Dries

 One more coat of finish tonight and the rod is complete. Dad might get his gift a little early as I can not wait to give it to him.
 

Thursday, May 30, 2013

The Next Rod Build Begins

  The start of yet another rod build is under way. This particular rod is for my first fishing mentor, my dad. Fathers day is approaching fast, and after the last rod build I had old dad drooling  over it. So I figured what better than a custom rod for my dad for fathers day. He is a big time Bass fisherman and has a ton of casting rods, why not build him a spinning rod. This particular rod is going to be very different than any other spinning rod you will find on the market today. I am setting him up with a Microwave Guide System that just came out last year I think from American Tackle. The guide system itself intrigues me on its functionality. It will reduce line slap on the rod itself, increasing casting distance and accuracy, and also increasing sensitivity. Here is a pic of the first guide or stripper guide as it would be called in the rod building world.


 The little eyelet in the center of the big one actually comes out about a quarter of an inch past the big eyelet. This is what helps keep line slap on the rod down. After this guide there is one slightly smaller than it goes down into micro guides after that, similar to what you would see on a micro guided fly rod these days. Here is a slow motion photo taken of the Microwave Guide system in action versus a conventional run of the mill type of spinning rod.


 Here is a photo of the complete guide set.


  It will be very interesting to give this rod a cast when complete. I already have a feeling it is going to phenomenal!

  As for the rest of the rod I went with an MHX blank 7' 1 piece 6-12lbs line in a medium/light action, with a split grip layout. Here is a photo of the grip mounted with the reel seat on the blank.


  When the package arrived from Mudhole, I was shorted the fore grip. I had to improvise as I am under a time restraint right now with other things I already had on the agenda. The fore grip wouldn't be here until mid to late next week and that would have set me way back behind schedule. So a couple of weeks ago I was fishing on my home lake and was snagged in the rocks and needless to say I broke my rod that I was fishing with. I was sitting in my work area wondering how in the hell I was going to complete this rod without the fore grip, and then I saw the broken rod in the corner. It hit me to use the fore grip off that rod as it was no longer a good rod to use. I pulled the old fore grip off the rod and gave it a sanding as it was tinted with dirt and fish slime. Polished it up and slipped it on the rod and it almost looked like it was meant to be.This fore grip is actually slightly longer than the one I originally ordered, and I believe it will be a little more comfortable fishing with the new/old grip.

  I will continue to post pics of the build as it progresses. I started wrapping guides last night in a dark green color, as green is dads favorite color. I will have some nice trim bands on the guide wraps, as well as some pretty cool cross wraps to go along with the rest of the rod. Stay tuned!

Tuesday, May 21, 2013

Another Rod Build Finished

  Last week I posted the latest rod build I have been working on. This rod is for my good friend Scott. I put in a lot of time on this build and also added some nice cosmetic touches. I tried my first cross wrap on this rod and I must say it came out pretty dam good. It defiantly added some extra pop to this rod. The following pics are while the rod was drying with it's second coat of finish on it. The third and final coat went on last night. Hope Scott loves the rod as much as I do. It will be his Birthday Gift for the big 60 this weekend.


 I will have some more pics of this rod to post once the drying is done and I can pull it out of the rod dryer.

Thursday, May 16, 2013

The Start Of A New Rod Build

  Tuesday night I started another Rod Build. The rod is an 8'6" Trolling rod that I am building for a good friend of mine, Scott Perz. Scott fishes the MWC Walleye circuit, and his love and knowledge of trolling for many different species just amazes me. Scott and I fish together all the time as stated in previous posts. Well my good friend turns the big 60 next week and I wanted to get him something special. He typically uses Ugly Stiks when trolling, and this drives me nuts. They are decent rods, but why not add a little flash to the arsenal. I went with a MHX Blank 8'6" in length 2pcs. so he could break it down and put it into his rod locker. Add some flash by going with Holographic guides. I am wrapping the rod with Metallic Threads in a purple and silver. The purple and silver theme is to match the colors of his Ranger boat. So far it is looking sweet, and I can't wait to see some finish on this rod. The finish will help the thread colors pop off the blank. I also went with a nice cork handle and fore grip. Cork always seems to stand up to the abuse a lot better than EVA Grips in my opinion. I snapped a few pictures at the bench last night. Here they are, and I will continue to post more as the build goes on.


Thursday, March 14, 2013

2 Rod Builds Complete

  As of yesterday the 2nd of the 2 rods I built, are complete. The old yellow rod finished drying last night and looks new again. Needless to say I am extremely anxious to head to the stream to try these two out. If all goes well I will be hitting up the driftless area this weekend. Here are a few photos of the completed rods.


Tuesday, March 12, 2013

Rod Building Progress Continued

  The past week or so I have been posting some photos of my rod building that I have been doing. The 4pcs. 4wt. 9' rod is almost complete. It is currently in the rod dryer with the 2nd coat of thread finish on it. The full dry time is 24 hours. In the mean time I have managed to get the old glass rod rewrapped and a coat of finish on it. What a difference it has made. The rod used to look old and beat up and now it looks as new as can be, but still has hints of being vintage.
The improved Glass rod. New  cork grip, new titanium guides(grayish in color for an older look), and new red thread.
I left the reel seat and old ferrules on to keep a little more vintage look to the rod. 

The old glass rod before being stripped down. Notice the electric tape handle, and the brittle  thread wraps.


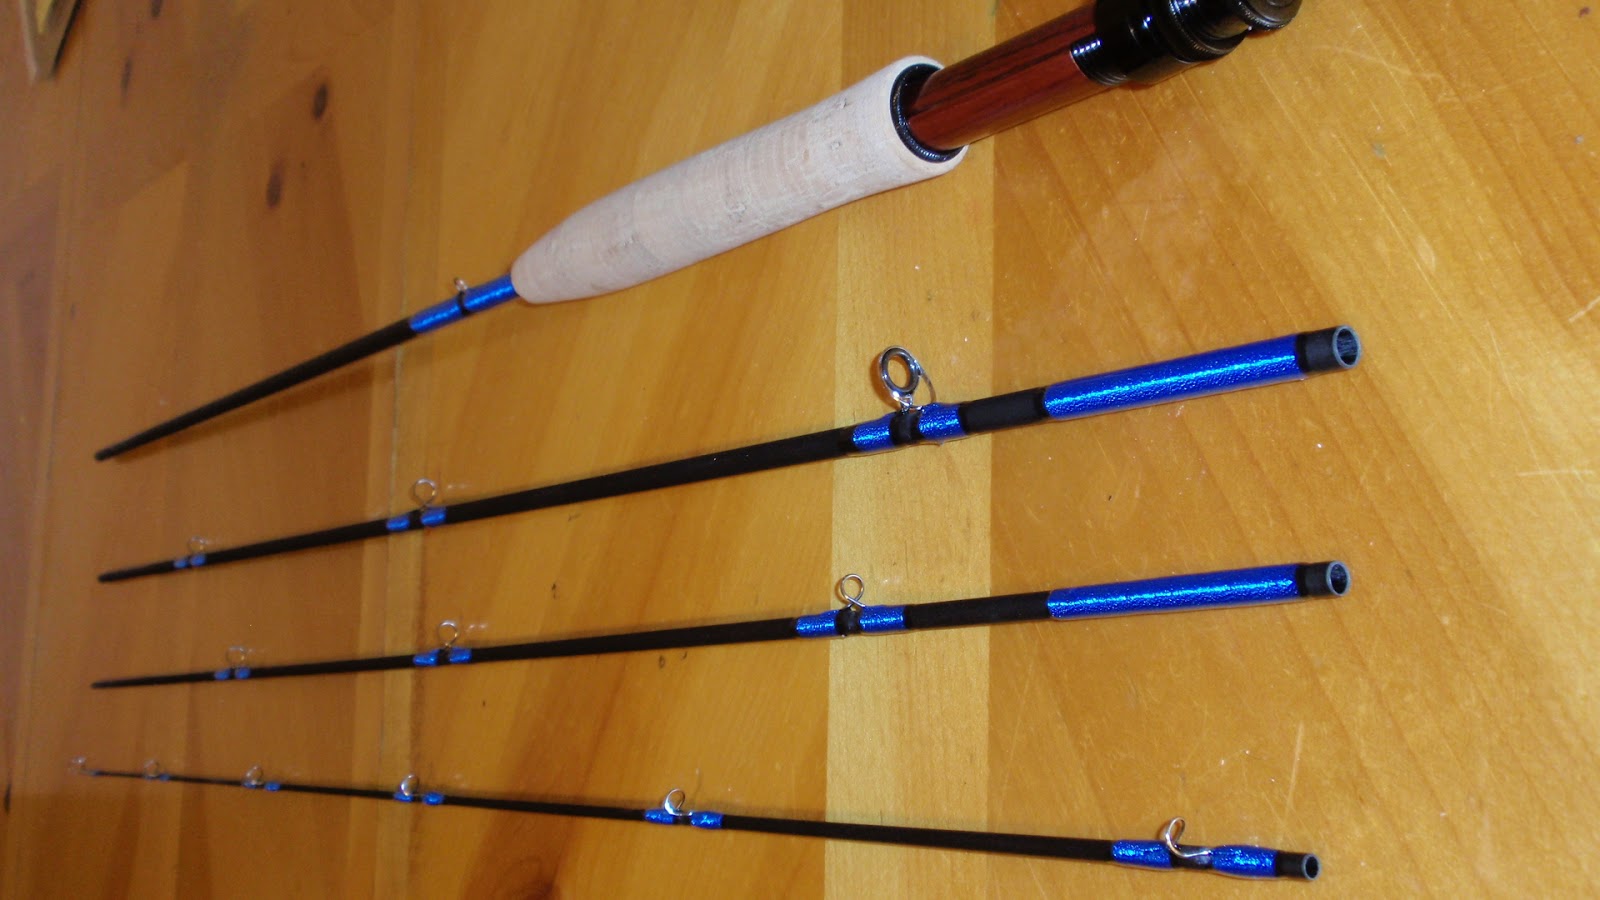
  Here is a shot of the new 4pcs. 4 wt. in the rod dryer. I wrapped all the guides with a metallic blue tread, so it really pops of the black slate finished blank.


Sunday, March 10, 2013

Rod Build Progress

  As stated in my post from earlier in the week, I am venturing into the hobby of building rods. The past week has been late nights getting my first rod going. This 4 pcs. 4 wt. 9 foot rood is going to be a gem to me because its my first build. I wanted to keep it simple so I just did a straight metallic blue wrap for all the guides, hook keeper, and furrle ends. It is defiantly coming together and I should have it finished sometime this week. Here are a few pics I snapped of the rod after being wrapped.


Thursday, March 7, 2013

Christmas In March???? Rod Building???

  Well yesterday felt like Christmas to me. I finally got all the things I wanted and then some it seemed. As I mentioned back in my first post, I am going to start to do somethings that I have never  done in the past. The one thing I had mentioned was rod building. Rod building is a unique hobby of it's own. After countless how-to videos and reading on the subject, I decided  to pull the trigger and jump into it. Yesterday my package of rod building goodies arrived along with another package from Cabelas containing my new wader and wading boots.


  After sorting through all the goodies I started to get organized. I purchased a 4pcs. 4wt. 9 foot rod to build out first. I also have a vintage glass fly rod that I am stripping down to rebuild, and another 4wt. rod that needed a repair. Like I said before I am jumping right in to get my feet wet. After getting everything set-up last night I started the preparations to start the new 4wt. I got the reel seat prepped for installation, and the cork grip reamed out and prepped for installation. Mixed some epoxy paste, and started installing.
Here is the grip and reel seat installed and drying in my rod wrapper. Looking pretty sweet!


  Next thing I did was snapped a few pics of the old glass rod I am going to rebuild for some before and after pics when I complete it. The rod was in pretty sad shape and was that bad when a friend of mine gave it to me. The cork grip split into three pieces constantly rotating on the rod so I improvised some electrical tape to hold it together and stop the rotating while it was being used. Some of the threads started to unwind themselves as well. This rod is an old eagle claw or south bend rod. I haven't been able to figure out the date of manufacture, but the old gentleman I received the rod from thought it was from the late 60's or early seventies possibly. Either way it is going to be a cool piece of glass when it is complete. Here are a few of the before pictures.


  As you can see this rod is in pretty sad shape. The guides are worn, there is barely any thread finish left on the threads, and the cork grip is obviously shot. I am keeping the original reel seat, but replacing the grip and guides. I am going to put on titanium guides so it keeps the older gray look of the the guides, and replacing the cork grip with a new reversed half wells cork grip. 

  After stripping down the rod last night I was able to get the grip reamed and mounted, and the rod pretty clean. Here is a shot of the new grip mounted and the guides stripped off the rod.


  It is already looking a ton better than before. I can't wait to see what it will look like when it is done.